by David Norelid | Jan 11, 2012 | Tech Note |
The old version of this guide was very complicated and convoluted. If you can boot into Windows, then you shouldn’t need to mess around with PLoP or any other nonsense, just change a flag in the ini file of the Windows flash program and you’re set.
I need to add the following disclaimer from my old post
NOTE: This guide is written for tech savvy people who know what they are doing. If you are uncomfortable with the command line, flashing BIOSes or getting your hands dirty, don’t attempt this process yourself. I cannot and will not hold your hand while you do this. I wrote this guide because I didn’t see anything like it online and I wanted to leave it here as a quick guide for other techs. I can’t offer support for this procedure. If you need
computer repair in Houston, then please call me and I would be glad to do this for you
From a commenter named Hilal, we have the following instructions:
You can also download the the windows version of the flasher, open the platform.ini file with notepad. In the ForceFlash section, set Password = 1 . It will force the flasher to reflash the password and thus removing it. Then open the flasher exe file and Flash! I tried it and it worked on my Acer Travelmate.
In sequential instruction form, here’s what you do.
1. Download the BIOS update from your computer manufacturer’s website
You should see the option to download a DOS version or Windows version, get the Windows version. This guide will only work with the Windows version of the flash tool.
2. Extract the archive
It doesn’t matter where, so you can throw it on your desktop if you want
3. Edit the platform.ini file
In this file, you’ll see a section called ForceFlash. In there, there’s a value called “Password”, set it equal to 1. If you don’t see “Password” in the ForceFlash section, then just copy and paste this line into that section
Password = 1
4. Run the Flash tool to flash your BIOS
Let the tool run and reboot your computer when it’s done. Hopefully, if all goes well, your BIOS should no longer be password protected.
Thanks, Hilal! I hope it works for everyone here.
by David Norelid | Jun 3, 2011 | Tech Note |
Just a quick post on another tip that I figured out while solving a client’s problem.
If you have AutoCAD 2012 configured for standalone licensing, but then later set up a license server, you don’t need to uninstall AutoCAD to then reinstall it with network licensing.
All you need to do is change one registry key and you’re set. In recent versions (maybe 2010 and up), AutoDesk has changed the registry values, so similar guides for AutoCAD 2009 and older are now outdated.
Run regedit and find the following key
HKLM\SOFTWARE\Autodesk\AutoCADR18.x\ACAD-x:x\AdLM

"Type"=dword:00000019
The X values change from version to version
Change the value of key called “Type” from 2 to 1. It doesn’t matter if you have decimal or hex selected, as in this range, 1 in hex is the same as 1 in decimal. This key tells AutoCAD which licensing type to use.
1 = network
2 = standalone
Close out of regedit and run AutoCAD 2012. It will ask you where your license server is, so just enter the hostname of your license server and you should be good to go. It asked me twice for the license server, so it could ask you twice as well. I didn’t have to specify the license server on subsequent program launches.
This also works in reverse. If you’ve left the office but forgot to check out a license to your laptop copy, you can set it to standalone (change from 1 to 2) and it will run for 30 days in the trial mode.
Couldn’t be easier, right?
by David Norelid | Jun 2, 2011 | Tech Note |
UPDATE: If you can boot into Windows, then try this updated Windows-only method
I had a customer drop off a laptop with a BIOS password locking the customer out of the BIOS settings. The laptop was an eMachines E527-2537 running Windows 7 x64. Normally, you can reset a BIOS password by removing the CMOS battery, but laptops typically don’t have CMOS batteries to remove, leaving you with having to either send the laptop in for service from the manufacturer, or trying to hack the BIOS password another way.
In the past, with AMI/Award/Phoenix BIOSes, there have been tools available to decrypt, reset, or otherwise mangle the BIOS settings into removing the password. Unfortunately, none of those tools work on EFI firmwares, which are the next generation of BIOS. Naturally, this laptop just has to have an Insyde H2O EFI firmware, making the old tools obsolete.
To add to the problem, this laptop was unable to boot from a CD because the boot option were hidden in, you guessed it, the password protected BIOS. So. Here’s what I did to get the laptop to boot from a USB stick and reset the bios password.
NOTE: This guide is written for tech savvy people who know what they are doing. If you are uncomfortable with the command line, flashing BIOSes or getting your hands dirty, don’t attempt this process yourself. I cannot and will not hold your hand while you do this. I wrote this guide because I didn’t see anything like it online and I wanted to leave it here as a quick guide for other techs. I can’t offer support for this procedure. If you need
computer repair in Houston, then please call me and I would be glad to do this for you.
This guide will take you through a few steps. We will install a boot loader to get around our inability to select a boot device thanks to the BIOS password. If you can already boot from USB for whatever reason, then skip to step 4 and then to 6. We will then prepare a bootable USB stick and our BIOS flashing batch file. Finally, we’ll boot from the USB stick and flash our BIOS.
1) Install PLoP Boot Loader to boot from a USB stick
Since I was still able to boot into Windows 7, I used EasyBCD to install PLoP in the Windows Boot Manager. PLoP is a boot loader which will allow us to boot from other media like CD/DVD, network and USB sticks. If you are on XP or earlier, you can install PLoP via a different method. Google it.
Install EasyBCD and install PLoP as the BIOS Extender, as shown in this image.

2) Prepare a bootable USB stick
There are many guides on how to create a USB stick that is bootable into DOS. Here is one that you might like.
3) Place the BIOS files on the USB stick
Go to your computer manufacturer’s website and download the latest version of the BIOS for your computer. It will likely come in two versions, one to flash from Windows and another to flash from DOS. We want the one to flash from DOS. There will be a few files in the archive, one called flashit.exe (the BIOS flashing program), another with a name like pawf5106.fd (your file might be named differently, this is the filename for the laptop I was working on), and a batch file with some parameters set for flashing.
Create a folder on your USB stick and place these files in it. The name doesn’t really matter.
4) Edit the batch file to reset the bios password
This is the important bit. If you look at the batch file included with the DOS flashing kit, it might look like this
flashit PAWF5106.fd /fe /b /dc
add the flags /C and /FP to the end of the line, so it looks like this
flashit PAWF5106.fd /fe /b /dc /C /FP
the C flag will clear the CMOS memory and the FP flag will flash your bios without a password. Without that flag, any bios update will retain the old password. The bios file (PAWF5106.fd) will likely be different for you.
5) Use PLoP to boot from your USB stick
Plug your USB stick in and turn the computer on. On the Windows Boot Manager screen, select the BIOS Extender and then select USB from the boot options.
6) Flash the new password-less BIOS
From the DOS prompt, navigate to the folder that contains flashit, the BIOS file, and the batch file. Make sure the computer is plugged into AC power and fully charged. Run your edited batch file and wait for the flashing process to finish. Once it is done, it will reboot automatically.
7) Get into the BIOS to verify that the password has been removed
Hit F2 as the computer boots to get into setup. Look at that! No password prompt! Congratulations! Now you can tun on the F12 Temporary Boot Menu and change the boot order all you want.
I hope this helps you out and saves you some time. Lord knows I wasted plenty of mine. If any parts of this guide are overly vague, leave a comment and I’ll see if I can’t clean it up. I’ve also been up all night working on this laptop, so I might be a little funny.
by David Norelid | Aug 12, 2008 | Blog |
I did an interview with KHOU the other day for a piece on the lawsuit mentioned earlier and how it was progressing. They were at my lab for an hour or so and ended up using about 15 seconds of footage.
Like the video says, computer repair work isn’t the most glamorous work, but it’s what I love to do. Give me a call and I’ll show you!
Link to the news article: New law may require computer techs to be private investigators
Link to the video footage: KHOU Video
Here’s another quick picture someone at IJ snapped of me outside the Austin courthouse. I felt bad for everyone out there in wool suits, the linen was very nice to me that day.

by David Norelid | Jul 1, 2008 | Blog |
I was in Austin last week with Mike Rife of AustinPCTech and Thane Hayhurst of iTalent Consulting Group and we filed a lawsuit, with the help of the Institute for Justice (IJ), against the State of Texas for a law they recently passed requiring computer repair technicians to hold private investigator’s licenses for a lot of the computer work we do. I wrote about the law a month ago and will spare you the details here.
In short, the state of Texas passed a law that would computer repair technicians to have a private investigator’s license to perform many kinds of computer work. The license requires a criminal justice degree or a 3 year apprenticeship, and failure to comply carries a penalty of up to one year in prison and $14,000 in fines for both the repair tech and the customer. Requiring computer repair technicians to hold these licenses would put many smaller repair shops out of business.
With the help of IJ, Rife, Hayhurst, a PC repair customer, and I are suing the state of Texas to have the law repealed or have its scope restricted.
Here are some links to news and articles about this case on TV and around the web:
If you find any other coverage of this on the web, please post it in the comments. I’d love to see it. As always, I’ll be updating this blog with news as it happens, so check back regularly, or subscribe to the RSS feed!
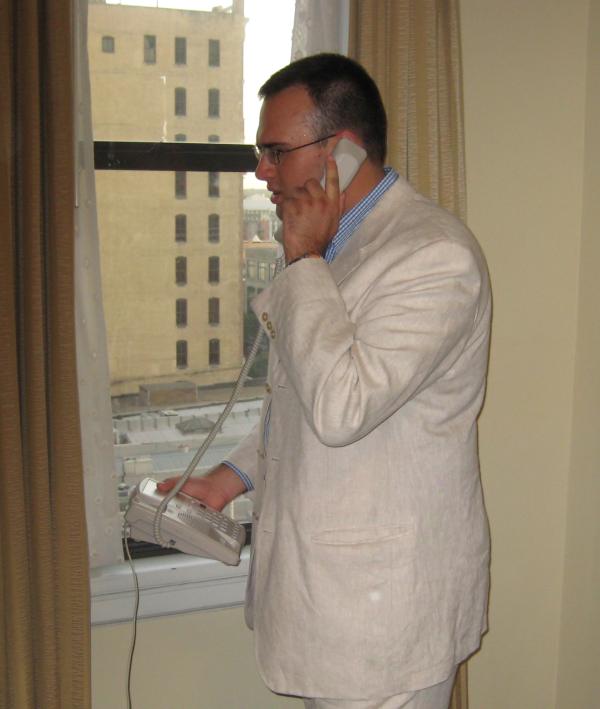
“Magnum PI? More like Magnum PC, get my lawyer on the phone!”